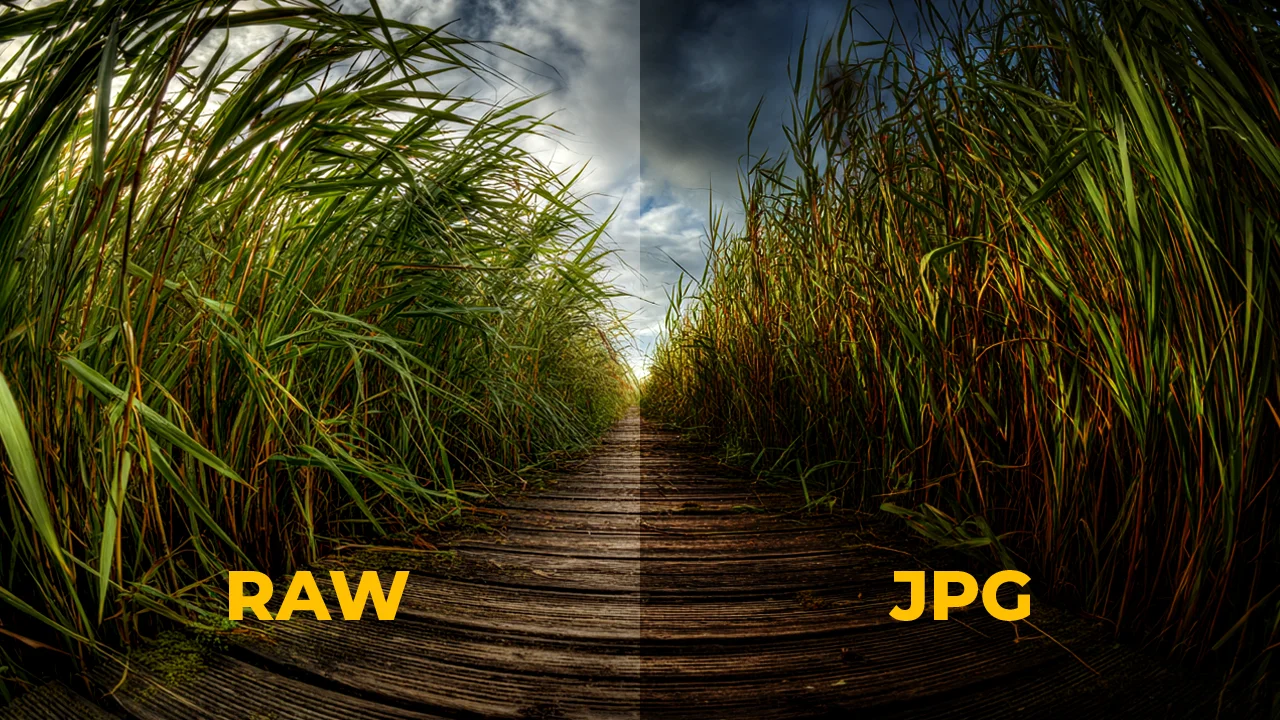
You don't have to ask yourself this question every time you look into your camera bag; but you've asked it at least once: Should I shoot RAW or JPEG? The question looks innocent, but it's actually a strategic choice that defines your post-production philosophy, your workflow speed, and what you expect from the final image. The difference between RAW and JPEG isn't measured in megabytes alone — one tells you to trust the camera's decisions, while the other puts that decision entirely in your hands. Here, I'm laying out every technical, creative, and workflow difference between these two formats, including the parts that tend to get glossed over.
From Sensor to Disk: The Real Difference Between the Two Formats
When light enters the camera, the sensor converts photons into electrical signals. These signals are converted from analog to digital and transmitted to the processor as "raw" data. This is where the two formats diverge — and this point of divergence is everything.
RAW format records this raw data produced by the sensor as-is, with the camera's intervention kept to a minimum. JPEG, on the other hand, is the result of the camera's internal processor (DIGIC in Canon, EXPEED in Nikon, BIONZ in Sony) interpreting, processing, and compressing this data. RAW is what the sensor sees; JPEG is what the camera wants you to see.
One is raw material of archival quality; the other is a ready-made product fresh out of the oven. If you're asking which one is better, you should first ask what you want to do.
Bit Depth and Dynamic Range: The Truth Behind the Numbers
JPEG is an 8-bit format. This means there are 256 distinct tonal steps in each color channel — red, green, blue. The total color capacity is approximately 16.7 million colors; while this sounds impressive, you'll hit its limits very quickly in post-production.
Modern RAW files, on the other hand, work at 12-bit or 14-bit depth. At 12-bit, there are 4,096 distinct tonal steps per channel; at 14-bit, there are 16,384. The mathematical difference becomes concrete like this: while JPEG fits 256 tonal steps into its channel, 14-bit RAW fits 16,384 steps into the same channel. This difference may seem meaningless — until you try to pull back the brightness of a sky in Lightroom or recover the shadows in a background.
The matter of dynamic range also enters this equation. RAW retains far more information than JPEG in both the extreme highlights and the extreme shadows. Achieving correct exposure at the moment of shooting is critical in both formats, but your margin for error is unquestionably wider in RAW. A portrait shot against the sun, a high-contrast interior, or mixed lighting conditions — these are scenarios that will either save you or eliminate you in post-production.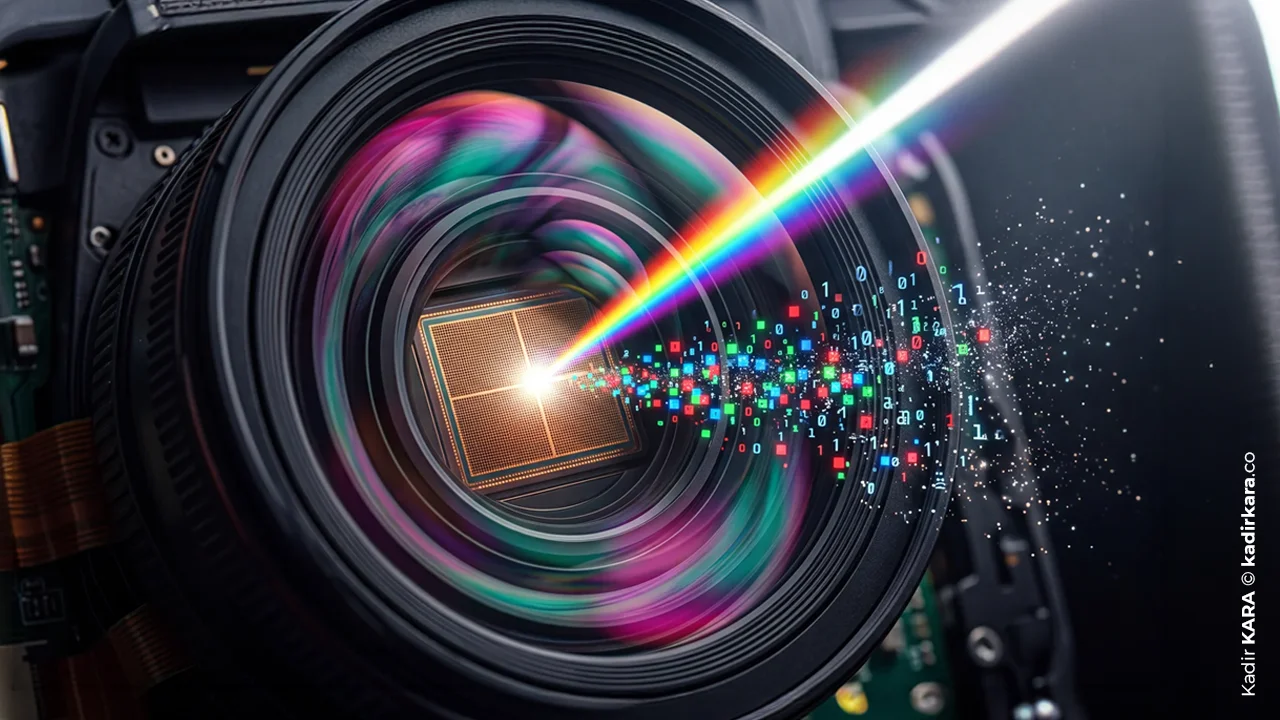
What Happens Inside a JPEG as It Comes Out of the Camera?
When you shoot in JPEG, the camera sequentially makes the following decisions in the background within a fraction of a second:
White balance is applied:
The white balance value you set or left on automatic is baked into the file. This is now an irreversible decision; you can't redefine the scene's color temperature from scratch in post-production — at most, you can make minor corrections.
A color profile is applied:
The tonal preferences the camera offers under names like "Picture Style," "Creative Style," or "Film Simulation" are embedded into the file.
Sharpening and noise reduction are applied:
The camera's internal algorithms make these decisions automatically. You can guide how aggressive they are to a limited degree through the camera's menu, but control is never fully in your hands.
Lossy compression is applied:
JPEG compresses the data by dividing it into mathematical blocks using an algorithm called DCT — Discrete Cosine Transform. In this process, information is permanently discarded.
The result is reduced to 8-bit:
The vast majority of the 12-bit or 14-bit information produced by the sensor disappears at this step.
All of this happens silently, right before your eyes. And that's that.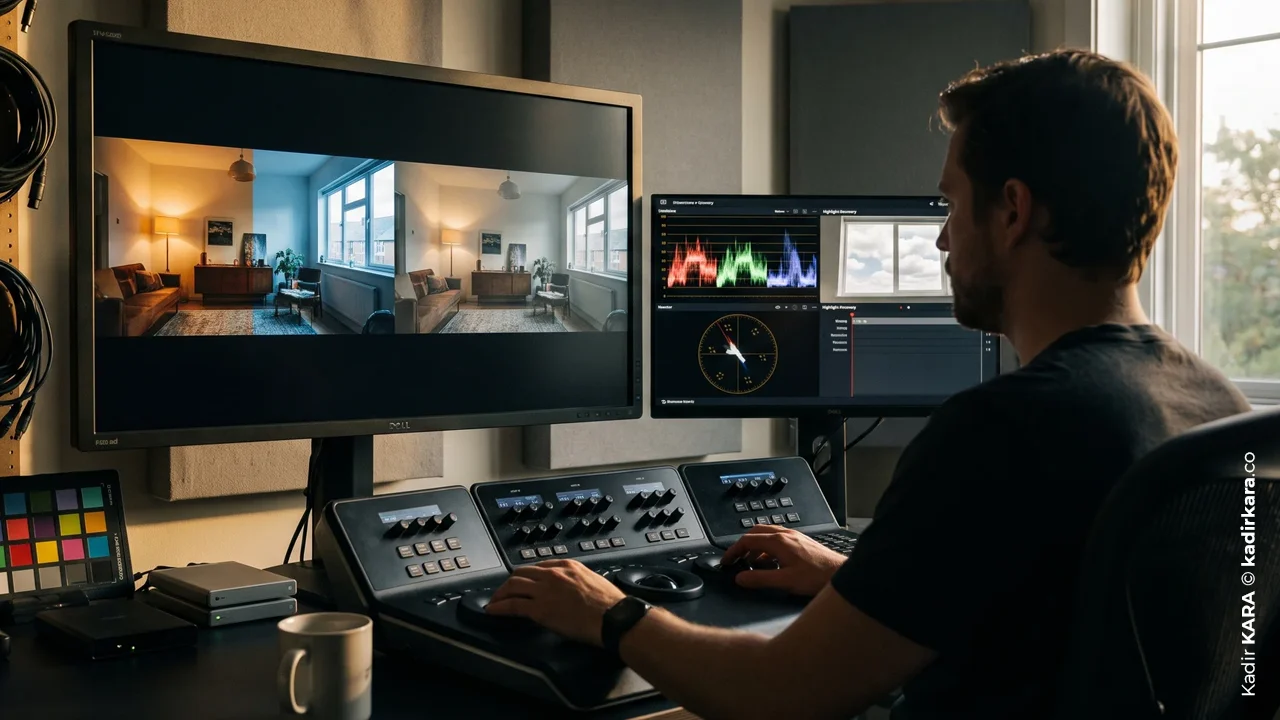
The Real Advantage RAW Gives You
Processing RAW is similar to printing a negative, only in a far more flexible and reversible way. When you open a RAW file in Lightroom, Capture One, or similar software, you are not working on the original file. The original always stays there, waiting unchanged. All adjustments are stored in the metadata layer; which is why "RAW processing" is actually interpretive, not destructive.
Let's look at what this freedom means in practice:
White balance can be completely redefined:
White balance determines how the camera interprets the color temperature of the light in the scene. Daylight is cool and bluish; a tungsten bulb is warm and orange. The camera applies a different balance to read these two lights as "neutral white." When set incorrectly, the photo either shifts to an icy blue, or warms in the opposite direction — a yellow-orange cast settles over everything.
In RAW, white balance is merely a metadata tag. The raw pixel data inside the file is never touched; the camera merely leaves a note saying "process this at such-and-such temperature." That note can be changed whenever you want, without limitation.
Let me make this a bit more concrete: You're doing an interior shoot. There are tungsten fixtures in the ceiling, and natural daylight is coming in through the window. Two different light sources, two separate color temperatures. The camera chose automatic white balance and locked onto something. If you shot RAW, you can object to this decision; you rebuild the color balance from scratch by referencing a neutral surface in the scene, as if you were relighting that moment from the beginning. If you shot JPEG, the decision the camera made at that moment is now engraved in the file — too bad. You can make minor corrections on top of it, but you can't define the scene's color temperature from scratch.
What does this mean in practice: An eyedropper correction for a slight color shift works reasonably in JPEG, but in an excessively warm frame — especially in bright areas — after correction you'll see banding in the color channels, unnatural transitions, and detail loss. What you save, you partially pay for there.
Highlight recovery truly works:
In an overexposed sky there is still information; pulling it back is possible. In JPEG, these areas are typically covered by solid white — what is called "blown out" — there is not a single pixel left to recover.
Noise management is far more effective:
In a RAW file shot at high ISO, noise reduction algorithms work with far more information. When you apply the same process to a JPEG, the algorithm is forced to work on data that has already been compressed and reduced; effectiveness drops, and detail loss increases.
A real space opens up for color grading:
Especially in work that leans toward a cinematic aesthetic or requires contrasty or delicate tonal gradation, RAW offers you a wide canvas, while working on a JPEG is like painting over a compressed ink print — beyond a certain point, posterization and banding become inevitable.
JPEG's Unjustly Underestimated Advantages
At this point, I need to be honest — JPEG is not a bad format. It's simply a different format.
A JPEG shot under the right conditions, well-exposed and managed at a level where the camera's color engine can be trusted, is more than sufficient for the vast majority. In some situations, choosing JPEG isn't just acceptable — it's the right decision.
When speed is critical, JPEG is unavoidable:
In photojournalism, sporting events, and environments close to live broadcast, image transfer speed is vital. Photographers working for news agencies most often shoot JPEG; because the file is small, uploading to the network is instantaneous, and reaching the editorial desk is a matter of seconds.
Fujifilm is the most compelling exception in this debate:
Fujifilm's sensor color science and Film Simulation engine have matured to such a degree that many professional photographers prefer the JPEG produced directly by the camera. Simulations like Provia, Velvia, and Classic Chrome were developed by analyzing real Fujifilm film emulsions; they deliver results that are far faster and often far more satisfying than trying to achieve the same look by processing RAW in post-production.
The difference in buffer memory and burst shooting capacity:
Because RAW files are large, the camera's buffer fills up faster and continuous shooting sequences shorten. In environments that demand fast photography, JPEG allows the card and buffer to operate efficiently for much longer.
Storage and archiving cost:
If you're producing thousands of photos in a professional shoot, the space taken up by RAW files can be 5 or 8 times larger than JPEG. This isn't just a disk problem; it means backup, cloud storage, and long-term archiving costs.
File Size, Buffer, and Workflow Realities
Let's be clear about the numbers:
In a mid-range mirrorless or DSLR camera, RAW files typically take up between 20 and 60 MB. The same shot compressed to JPEG fits into 4–10 MB. A shoot of a thousand photos can reach 20–50 GB in RAW, while staying around 5–10 GB in JPEG.
This difference affects every step of the workflow:
Import time grows longer, catalog performance slows down, backup costs increase, and a conversion step is added for delivering to clients. Working in RAW doesn't come with just a single advantage; it brings an entire ecosystem with it. Many photographers who ignore this end up struggling under a hard drive debt over time.
Which One for Which Situation? A Decision Framework
I don't want to present this as a simple binary, because it isn't one. But if you answer a few questions honestly, the preference becomes clear.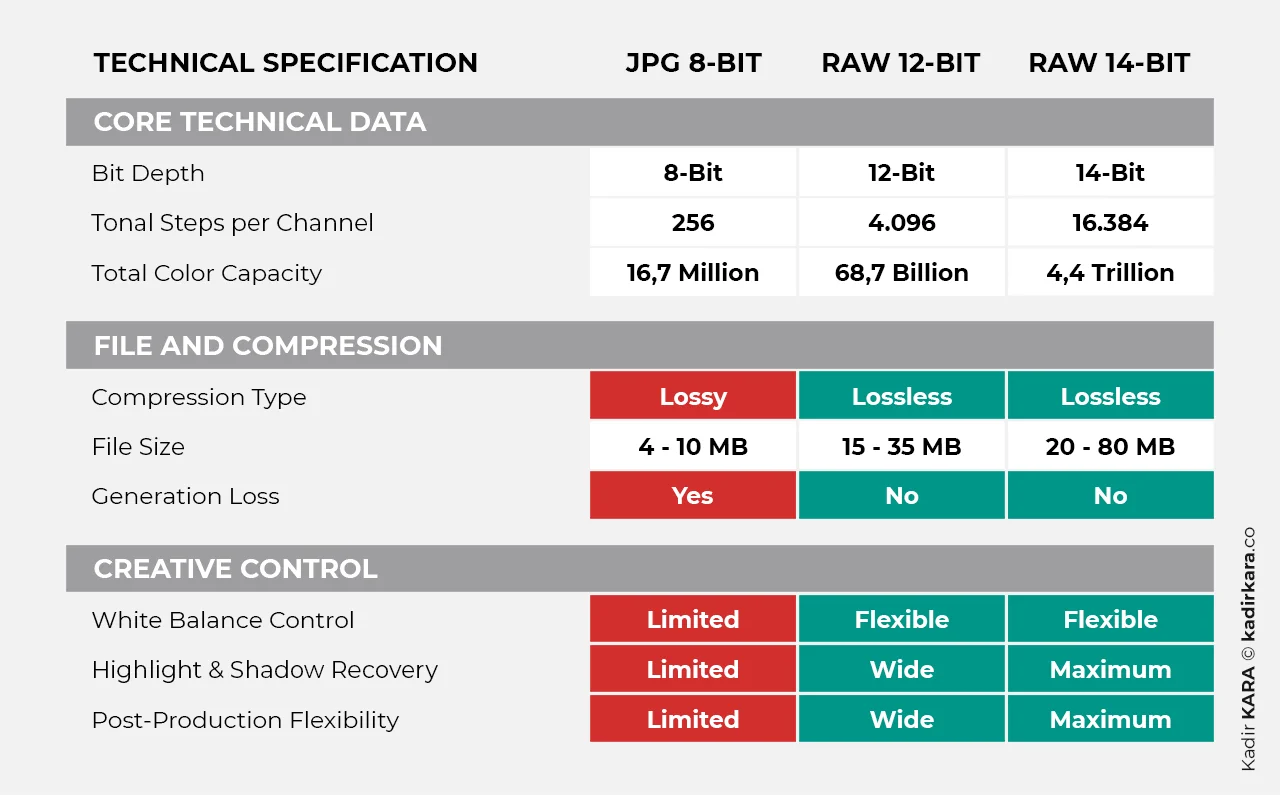
Will you be doing post-production?
If yes, RAW. If you're delivering as-shot, JPEG can be considered.
Are the lighting conditions difficult?
Backlight, high contrast, mixed color temperatures... these are conditions that make RAW necessary. In a controlled studio environment with a well-designed lighting setup, JPEG can be a far more reasonable choice.
Speed, or quality and flexibility?
The two can rarely be simultaneously at maximum. If speed is the priority, JPEG; if creative control and post-production flexibility are the priority, RAW is the right choice.
What does the client expect?
Advertising, editorial, fine art printing... these require RAW. Documenting a moment, social media content, news — JPEG is usually enough.
How powerful is the camera's color engine?
If you're working with a camera that has a mature film simulation engine like Fujifilm, you can trust the result produced by JPEG.
RAW + JPEG: The Comfortable but Costly Middle Ground
Most modern cameras offer the option to record both formats simultaneously. RAW to one card, JPEG to the other; or you can write both to the same card.
The theoretical advantage is clear: JPEG is used for quick previewing and client previews, while RAW waits in the archive. But in practice, this approach brings a serious storage burden and complicates the workflow. Keeping track of which version is where, managing two families of files — these are not small problems; they are problems that become chronic over time.
The scenario where I can recommend this method is as follows: You need to deliver quick JPEG preview files to the client on the same day, but you also want to guarantee archival quality. Beyond that, in most situations, deciding on one format and sticking to it provides a far cleaner and more sustainable workflow.
The RAW Processing Ecosystem: What Does Each Software Do?
If you decide to shoot RAW, software selection becomes your second most important decision. Because RAW processing software interprets the same file differently — color science, demosaicing algorithm, and interface preferences directly affect you.
Adobe Lightroom is the industry's de facto standard. Its catalog system, editing tools, and Adobe Camera Raw integration are extremely mature. However, the subscription model creates a significant cost over the long term.
Capture One is a strong alternative to Lightroom, especially in studio and fashion photography. There are areas where it surpasses Lightroom in color science and tethering capabilities; it offers both subscription and permanent license options.
DarkTable is open source and completely free. The learning curve is steep, but its capabilities are to be taken seriously. It's a valuable alternative for those with budget constraints or those wanting an independent workflow.
The proprietary software released by camera brands - Canon's Digital Photo Professional, Nikon's NX Studio — are generally the software that most accurately interprets the camera's own color engine. But from a workflow perspective, they fall behind third-party alternatives.
At this stage, I follow this path: I first bring the RAW files I shoot with the Canon R6 Mark II into Canon Digital Photo Professional. I make white balance corrections here because DPP uses Canon's own sensor color science, making this interpretation in the cleanest and most accurate way. I also define the color space as Apple RGB at this stage and take the output. For general color adjustments and toning, I then move to Lightroom. Two programs, two separate strengths — I use them not as substitutes for each other, but as complements.
This two-stage workflow may seem like an extra step, but its logic is sound: you leave the most critical decision — color balance — to the software that speaks the camera's language best; for the rest, you take advantage of the flexibility in the most powerful tool.
DNG (Digital Negative) is an open RAW standard developed by Adobe. Proposed as an alternative to proprietary manufacturer formats such as NEF, CR3, ARW, and RAF, this format offers advantages in terms of long-term archival reliability; but none of the major camera manufacturers have abandoned their own formats to switch to DNG.
The Philosophical Dimension: Do You Trust the Camera, or Yourself?
This choice actually carries the answer to this question: How much do you trust the decisions the camera makes in that moment?
When you shoot JPEG, you're telling the camera: "White balance, contrast, sharpness, noise management... you decide these, I trust the result." This is not a surrender; in the right conditions, it's a conscious efficiency choice.
When you shoot RAW, you're saying: "I want the raw state of this moment. I will decide what to process and how." This is not ego; it is the demand for creative control.
Both are legitimate. Both are the right answer in the right conditions.
But I can't move on without saying this: The possibilities RAW offers only become meaningful when you're actively working in post-production. In the hands of someone who ignores this, a RAW file is nothing more than a large and slow JPEG.
A BRIEF NOTE
There were years when I carried this question in my mind. In my early professional shoots, I trusted JPEG and accepted the camera's decisions without question. The place where I got stuck came from an unexpected direction — not a big production, but what seemed like an ordinary interior shoot for social media. Clear weather outside, midday — the conditions where light is at its harshest and highest contrast. My focus was on the interior, but the outside was visible through the window in the background. This difference was far beyond the dynamic range the camera could handle; the window blew out completely, not a single pixel remained to be recovered in that area. I turned to software, but what I could do with the data JPEG had left me fell far short of the flexibility RAW would have provided.
I wanted to write this piece because the question "RAW or JPEG?" is, far too often, reduced to a purely technical format debate. Yet this choice is a workflow decision, a philosophy, and most importantly, a preference that must be made consciously. I want to make a small but critical note here: Even in shoots where you think you won't need much post-production — like social media — don't base the decision "JPEG is enough" solely on that assumption. High-contrast transitions in the area you're shooting, the interior-exterior light difference, strong side lighting, the harshness of shadow-to-highlight — these are reasons for RAW in and of themselves. It's not automatically made decisions I advocate for, but decisions made with awareness and consciousness.
DID YOU KNOW? - 7 QUESTIONS 7 ANSWERS
1. RAW is not actually an acronym.
RAW is not an acronym, but an ordinary adjective in English meaning "raw, unprocessed." Each camera manufacturer gives their own proprietary RAW format a different name: Nikon NEF, Canon CR2 and CR3, Sony ARW, Fujifilm RAF, Olympus/OM System ORF. All are classified in the RAW category, but none of them are technically identical to one another.
2. Repeatedly saving a JPEG degrades the file.
When you open a JPEG and save it again as a JPEG, lossy compression is applied once more. The more this cycle repeats, the more invisible-yet-real quality loss accumulates. To prevent this, working in TIFF or PSD format during editing and converting to JPEG at delivery is standard practice.
3. Based on what data is the histogram in the camera calculated?
The histogram you see on most cameras' screens is calculated not from RAW data, but from JPEG data. For this reason, the histogram shows you the camera's processed interpretation. In RAW, more information may actually be available, both in highlights and shadows. This limitation needs to be kept in mind when making exposure decisions.
4. Why is "Expose to the right" (ETTR) only recommended for RAW?
Exposing as close as possible to the highlight limit without blowing out — this strategy, known as ETTR, reduces the noise level in RAW files to a minimum. Since the signal the sensor produces in low-light areas carries more noise than in high-light areas, exposing toward the bright side is preferred. For JPEG, this strategy is risky; overly bright areas are baked into the file and become unrecoverable.
5. RAW files actually start colorless.
Sensors are not color sensors. Through an arrangement called a Bayer filter, a red, green, or blue filter is placed over each pixel; the raw sensor data is actually a single-channel grayscale matrix. Color is created through an interpolation process called "demosaicing." This is why different RAW processing software interprets the same file differently — the difference in color science originates here.
6. Why does Fujifilm hold a special place in this debate?
Fujifilm's sensor color science and Film Simulation engine are, according to broad industry acceptance, of extraordinary maturity. Simulations such as Classic Chrome, Provia, Velvia, and Eterna were developed by analyzing real Fujifilm film emulsions. For this reason, many professional documentary and street photographers deliver the JPEG produced by their Fujifilm camera directly, rather than spending hours in Lightroom.
7. Why did DNG never become mainstream?
DNG (Digital Negative), developed by Adobe in 2004, was announced as an open alternative to proprietary RAW formats. However, none of the major manufacturers, including Nikon, Canon, and Sony, abandoned their own formats to switch to DNG. Underlying this are both technical preferences and business strategy concerns. DNG today remains a preferred option for archival reliability; but without camera manufacturer support, it was never able to become a true standard.


